
How to Connect Your Website to AI Schema Gen (WordPress, Next.js, Wix, Shopify and More)
The free check works on any site. To put fixes on your live pages, connect your site once: a plugin on WordPress, a package on Next.js, or one piece of code you paste in on Wix, Shopify, Squarespace, Webflow and anything else.
What this means
Connecting is how the fixes you make in AI Schema Gen reach your real website. It is a one-time setup, and how you do it depends on what your site is built with.
WordPress: our plugin connects your site and puts every fix on your pages for you. Next.js or React: our package does the same from inside your code. Anything else (Wix, Shopify, Squarespace, Webflow, a hand-built site): we build the code and you paste it into your homepage.
Why it matters for AI
Everything AI tools learn about your business from your site comes from what is actually on the pages. Details saved only in our dashboard help nobody until they are on your live site.
Connecting also lets us re-check your site and confirm each fix is really live, not just saved.
How to connect it
- 1
Find out what your site is built with
If you log in at
yoursite.com/wp-admin, it is WordPress. If a developer built it in Next.js or React, it is Next.js. Everything else, including Wix, Shopify, Squarespace and Webflow, is Any other website.Not sure? Our free check shows the platform it found at the top of your report.
- 2
WordPress: install the plugin and click Connect
In your WordPress admin, go to Plugins > Add New, search for AI Schema Gen, and click Install Now, then Activate.
In the plugin setup, click Connect Your AI Schema Gen Account and sign in. Your site appears under Sites by itself, so on WordPress you can skip the next steps.
- 3
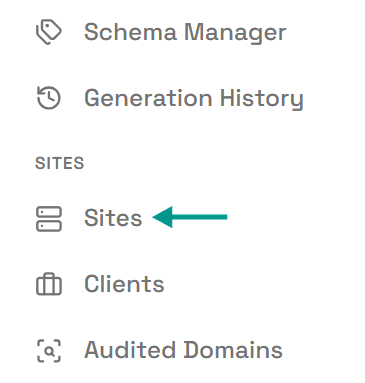
Open Sites
In the menu on the left, click Sites.
- 4
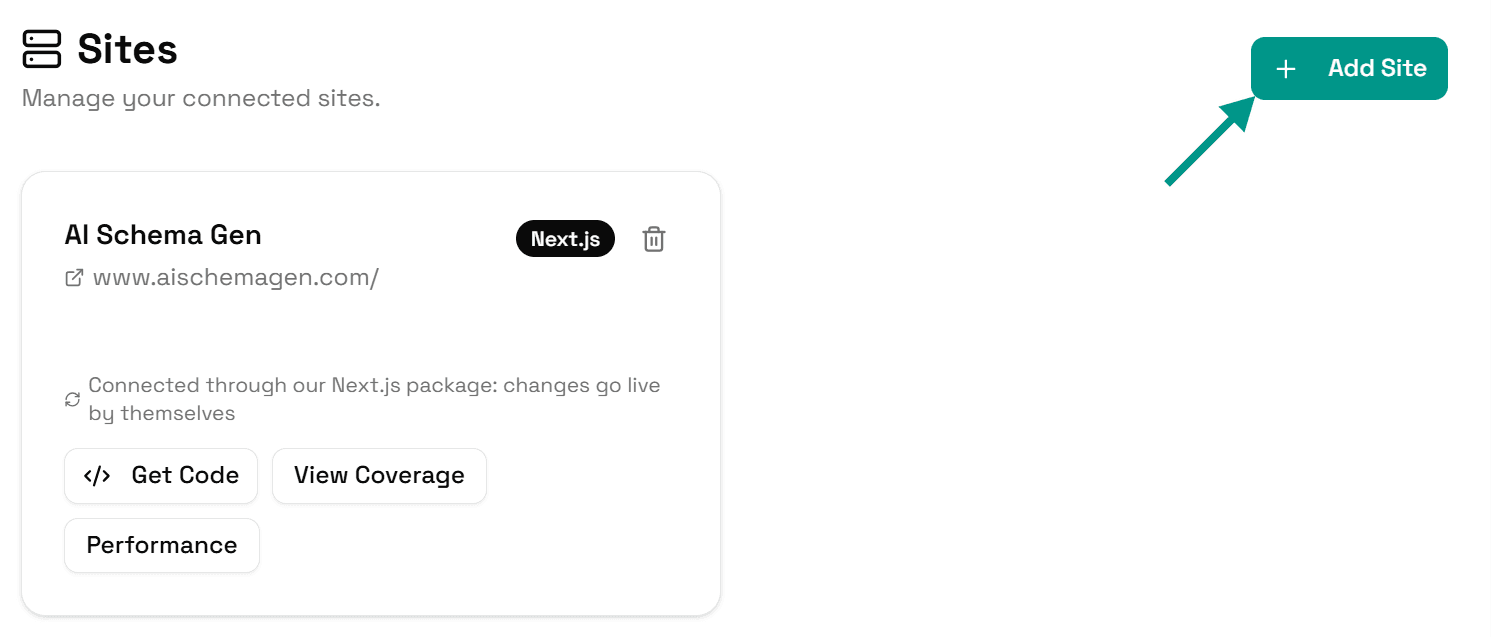
Click Add Site
Click Add Site at the top right.
- 5
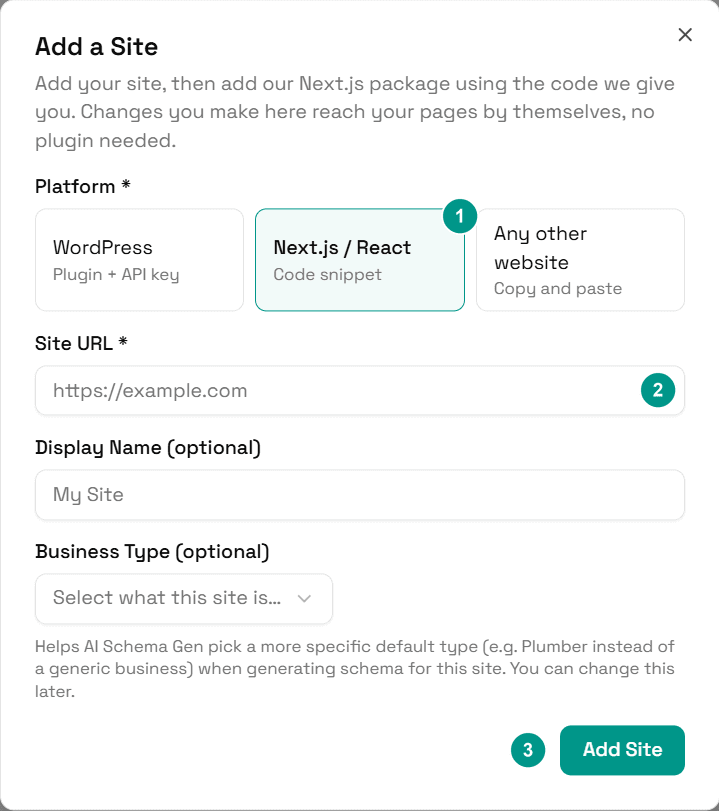
Next.js or React: add your site
Click Next.js / React (1), enter your site address (2), and click Add Site (3).
- 6
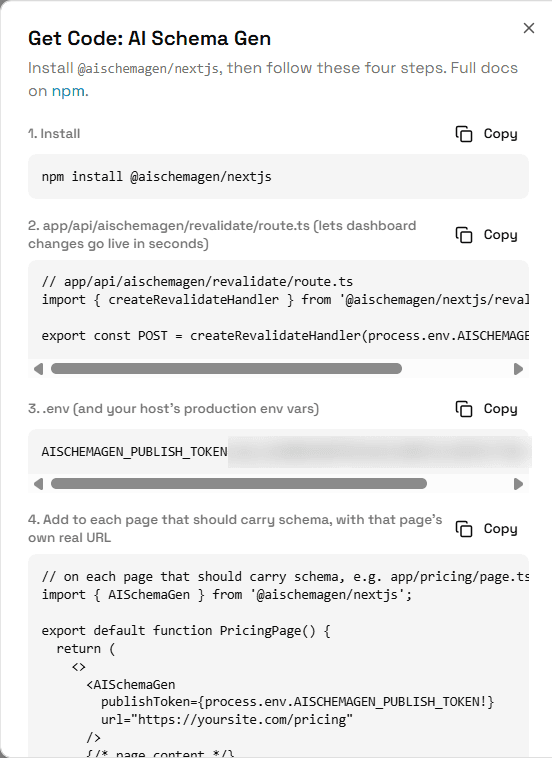
Next.js or React: follow the four steps in Get Code
The Get Code window opens. Copy each of the four parts into your project with its Copy button, then deploy your site once.
From then on, changes you make in the dashboard reach your pages by themselves.
- 7
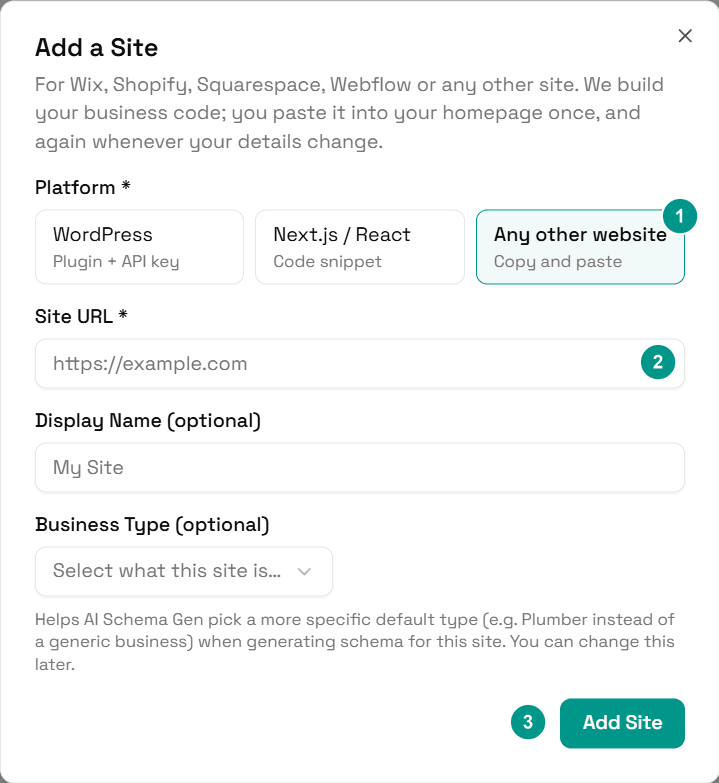
Any other website: add your site
Click Any other website (1), enter your site address (2), and click Add Site (3).
- 8
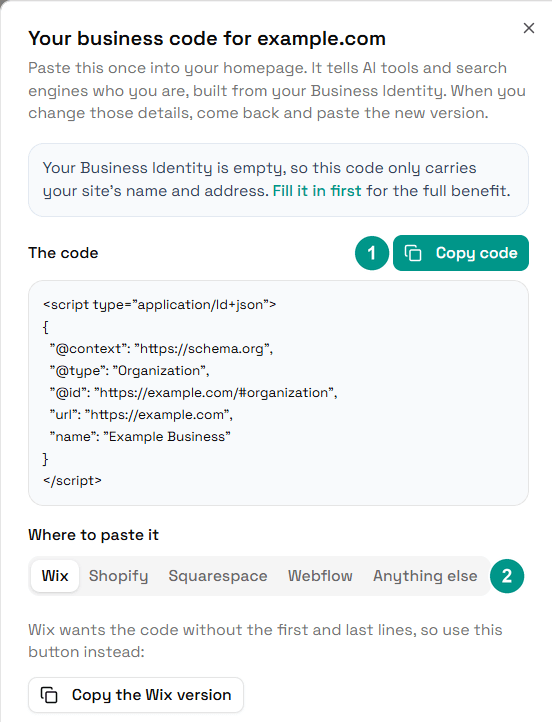
Any other website: copy your code and paste it in
Your business code opens. Click Copy code (1), then choose your website builder (2) and follow the steps shown under it.
On Wix, click Copy the Wix version instead.
- 9
Check it is connected
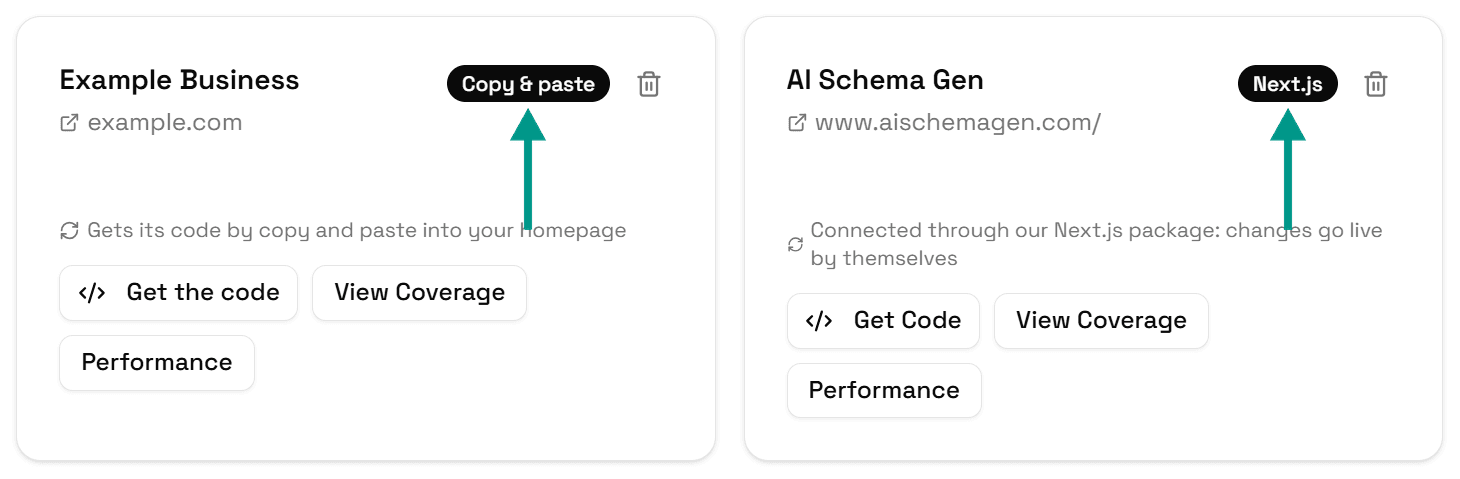
Your site now shows under Sites with how it is connected: WordPress, Next.js or Copy & paste.
If you change your details later, a copy-and-paste site shows Get the new code. Copy it again and replace the old code.
On WordPress
Your business details can be edited in the dashboard or in the plugin: they sync both ways. Dashboard changes reach the plugin when someone next opens your WordPress admin, or within 6 hours.
Check it worked
Run the free AI readiness check again after connecting and filling in Business Identity. Once your business code is live, problems such as Your site does not state the basics about your business drop off the report.
FAQ
See what else your site needs
The free check lists every problem on your site in order of how much it costs you.
Check your site free